
구글 위키에 있는 Teleport 설명은 아래와 같다.
"Teleport는 SSH, Kubernetes 및 HTTPS를 사용하여 서버 및 클라우드 애플리케이션에 대한 제로 트러스트 액세스를 제공하는 오픈 소스 도구입니다."
유료 버전은 Device trust, Hardware key support 등을 지원하기에 제로트러스트 액세스라 말할 수 있지만, Community 버전은 단순히 MFA(Multi-Factor Authentication)만 제공하기 때문에 제로 트러스트라고 말할 수 있는지 잘 모르겠다.
필자는 단순히 인프라 관리의 편의(중앙집중화)를 위해 선택한 Open Source이며, freeIPA와 함께 사용할 목적으로 검토하게 되었다.
로컬서버에 계정 및 su 권한은 freeIPA로 생성 및 관리하고 Teleport를 통해 사용자에게 SSH 접속 가능한 서버의 목록과 Console Tools를 제공하고자 하는 목적으로 Teleport를 운영하려 한다.
설치 방법은 1. Docker버전 설치, 2.DNF로 설치하기 두가지 버전으로 설명한다.
1. Docker 버전 설치하기
이미지 다운로드
Amazon ECR Public Gallery - Teleport/teleport
- 위 사이트에서 이미지 버전을 확인 후 다운로드 하면 된다.
- 해당글을 작성하는 시점에 recommend 버전은 14.2.3이다.
- Teleport 공식 docs에는 teleport-distroless:14.2.3 이미지를 recommend 되어 있지만 필자는 docker exec로 쉘 내부의 동작을 자주 보기 때문에 일반 버전으로 설치하였다.
- 또한 필자는 docker image를 다운 받을때 latest로 받는 것보다 버전을 명시해서 다운받는 것을 선호하기 때문에 14.2.3을 명시해서 받았다. (관리상 목적)
- -distroless는 shell이나 utility applications가 없는 버전으로 실행을 위한 바이너리 및 의존성이 있는 라이브러리만 포함되어 있는 버전이다.
- -debug는 debuging tools가 포함된 버전이다.
- 자세한 사항은 Installing Teleport | Teleport Docs (goteleport.com) 참고 바라며, 본 글도 해당 문서를 참고하였다.
Teleport Container 사전 지식
텔레포트 컨테이너가 실행될 때 컨테이너 내에서 필수로 접근하는 File system 및 Port는 다음과 같다.
- Configration(설정파일) : /etc/teleport.yaml
- Data directory(저장 경로) : /var/lib/teleport
- License file(라이선스 경로) : /var/lib/teleport/license.pem (엔터프라이즈 버전 구매 시)
- Other file paths(그 외 경로) : 그 외 추가경로는 설정파일(/etc/telport.yaml)에 별도 설정한 경로를 접근한다.
- Network Port (Listen port)
- Proxy (with TLS) : 443, 3021
- Proxy (without TLS) : 3021, 3023, 3024, 3080 or 443, 3036(mysql)/5432(postgresql)/27017(mongoDB)/ 6379(redis)
- Auth : 3025
- Agent : 3022(ssh), 3026(k8s), 3028(windowds desktop)
- 자세한 내용은 (Networking | Teleport Docs (goteleport.com)) 참고
기본 설정으로 실행한다면 위 경로에 대해 별도로 신경쓸 필요는 없지만 그렇지 않다면 위 경로를 아는 것은 매우 중요하다.
Docker는 별도 옵션없이 실행 시 휘발성의 데이터라고 생각하는 것이 옳다. (docker의 기본 메커니즘)
그렇기 때문에 내가 설정한 설정파일로 컨테이너를 실행하고 싶거나, 컨테이너가 저장한 파일을 영속성 있게 관리하고 싶다면 '-v' 옵션(외부 저장경로 지정)을 사용하여 실행하여야 한다.
예를 들어 내가 설정한 설정파일(teleport.yaml)로 Teleport를 실행하고 싶다면 아래와 같이 실행하여야 한다.
docker run -v ~/my-local-path/teleport.yaml:/etc/teleport.yaml public.ecr.aws/gravitational/teleport:14.2.3(본 글에서도 Teleport를 기본 설정으로 실행하지 않을 예정)
사전 작업
먼저 Teleport Container가 마운트할 폴더를 생성한다.
mkdir -p /appdata/teleport/config /appdata/teleport/data- /appdata/teleport : 사용할 폴더의 중간경로로 사용자가 저장하고 싶은 경로로 설정하면 된다.
- config : Teleport의 설정파일을 저장할 폴더
- data : Teleport에서 생성한 데이터를 저장할 폴더
Config File 생성
사전 Config file 없이 Container를 실행해도 기본설정으로 실행은 된다. (대부분의 Open source는 디폴트 설정이 잘 되어 있다.)
하지만, 필자는 설정이 가능한 부분은 설정을 하거나 명시적으로 확인하는 것을 선호한다.
Config File 실행 커맨드
docker run --hostname localhost --rm \
  --entrypoint=/usr/local/bin/teleport \
public.ecr.aws/gravitational/teleport:14.2.3 configure > /appdata/teleport/config/teleport.yaml- configure > {경로}/teleport.yaml 실행 시 auth, ssh, proxy role에 대한 설정이 {경로}/teleport.yaml에 생성된다.
- 특정 role에 대한 설정만 생성하고 싶을 시 "configure --roles=auth,proxy"를 사용하여 생성하면 된다.
- 각 role별 상세 설정은 Teleport Configuration Reference | Teleport Docs (goteleport.com) 참고
최초 실행
각 role 설정이 너무 많으니 일단 무지성 실행을 강행할 예정이다.
Open source를 다루다보면 설정들이 너무 많은 것들을 볼 수 있다. Open source 특성 상 여러 상황에 모두 만족 시켜야하는 목적이 있기 때문에 많은 부분을 설정할 수 있게 개발되는 것이 일반적이다.
실행 방법
docker run --hostname localhost --name teleport \
  -v /appdata/teleport/config:/etc/teleport \
  -v /appdata/teleport/data:/var/lib/teleport \
  -p 3025:3025 -p 3080:3080 \
public.ecr.aws/gravitational/teleport:14.2.3- --name teleport : Container 명칭
- -v /appdata/teleport/config:/etc/teleport : 사전에 생성한 Config file이 위치하는 폴더이다.
- -v /appdata/teleport/data:/var/lib/teleport : Teleport가 생성할 파일이 저장되는 위치이다.
- Teleport는 Default database로 sqlite를 사용한다.
- 사전에 생성한 Config file에는 보이지 않지만 teleport 하위 설정에 storage > type 에 타 Storage를 설정 할 수 있다. (DynamoDB, S3, etcd 등을 사용할 수 있다고 기재되어 있다.)
- 상세한 Config 내용은 Teleport Configuration Reference | Teleport Docs (goteleport.com) 참고
- -p 3025:3025 : Auth Service가 사용하는 포트를 외부로 expose 한다.
- -p 3080:3080 : Proxy Service가 사용하는 포트트를 외부로 expose 한다.
실행 결과
데몬 모드가 아닌 foregraound로 실행했기 때문에 로그가 stdout으로 출력된다.
netstat로 리스닝 포트 확인 시에도 정상적이다.

사전설정에서 생성한 폴더 하위에 가서 확인해보니 sqlite.db 파일이 생성되었다. Teleport가 사용하는 기본DB이다.

브라우저를 통해 "https://서버IP:3080" 으로 접속하면 Login 페이지가 나온다.
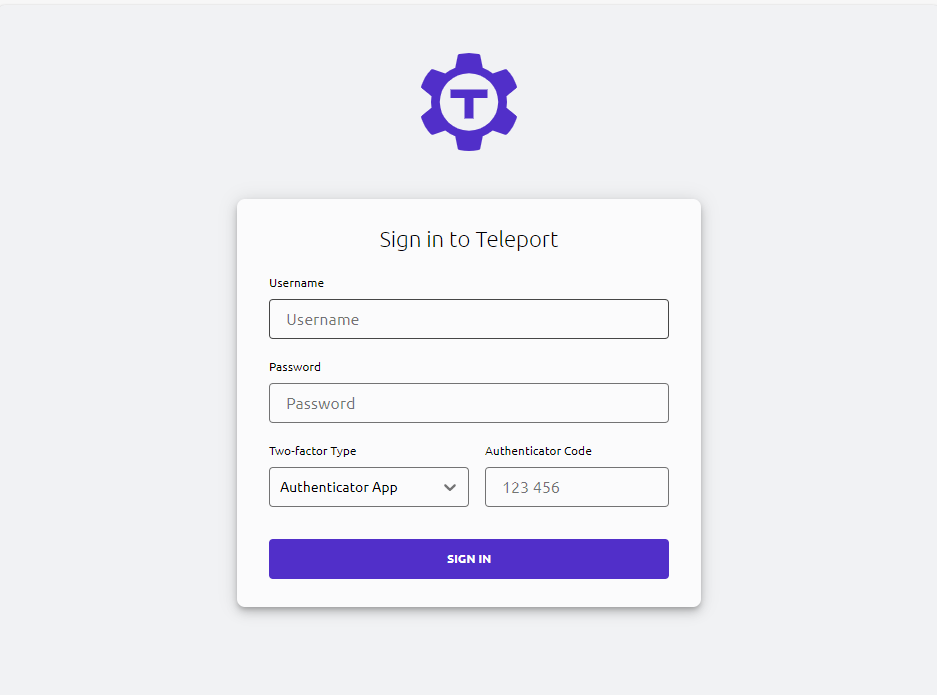
하지만, 로그인이 안될 것이다.
Teleport는 기본 관리자 계정을 주지 않기 때문에 최초 실행 후 tctl이라는 Teleport를 관리하는 CLI로 생성해주어야 한다.
(다음글 참고.)
2. DNF로 설치하기
설치 환경
- OS : Rocky Linux 8.9
- Kernel : 4.18.0-513.5.1.el8_9.x86_64
- 인터넷이 되는 환경
mod_ssl 설치
Teleport는 웹관리페이지를 제공하기 때문에 SSL 인증서를 필요 하기 때문에 사설인증서 생성 모듈을 사전에 설치해서 인증서를 발급받을 예정이다.
이미 사용하고 있는 인증서가 있다면 해당 설치는 skip해도 된다.
dnf install mod_ssl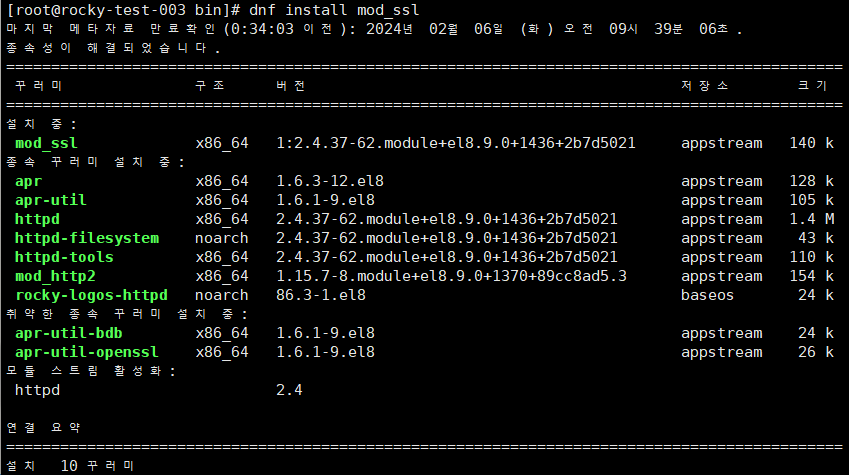
사설 인증서 발급
먼저 사설인증서를 저장할 폴더를 생성한다
mkdir -p /var/lib/teleport/ssl
openssl req -newkey rsa:2048 \
-nodes -keyout /var/lib/teleport/ssl/teleport.mysite.local.key \
-x509 -days 9999 -out /var/lib/teleport/ssl/teleport.mysite.local.crt- -days 9999 : 인증서 유효일이 9999일이다. 환경에 맞게 변경하면 된다.
- -keyout, -out : key 파일 및 인증서가 저장될 폴더 및 파일명이다.
[실행 결과]
[root@rocky-test-003 ssl]# openssl req -newkey rsa:2048 -nodes -keyout /var/lib/teleport/ssl/teleport.mysite.local.key -x509 -days 9999 -out /var/lib/teleport/ssl/teleport.mysite.local.crt
Generating a RSA private key
.....................+++++
...............................................+++++
writing new private key to '/var/lib/teleport/ssl/teleport.mysite.local.key'
-----
You are about to be asked to enter information that will be incorporated
into your certificate request.
What you are about to enter is what is called a Distinguished Name or a DN.
There are quite a few fields but you can leave some blank
For some fields there will be a default value,
If you enter '.', the field will be left blank.
-----
Country Name (2 letter code) [XX]:KR
State or Province Name (full name) []:대한민국
Locality Name (eg, city) [Default City]:서울
Organization Name (eg, company) [Default Company Ltd]:
Organizational Unit Name (eg, section) []:
Common Name (eg, your name or your server's hostname) []:
Email Address []:hahahaxt@tistory.com- 하단의 Contry Name, State, Locality Name 등등은 적당히 설정하면 된다.

teleport repo list 추가
dnf config-manager --add-repo https://rpm.releases.teleport.dev/teleport.repo
dnf repolist
Teleport 설치
dnf install teleport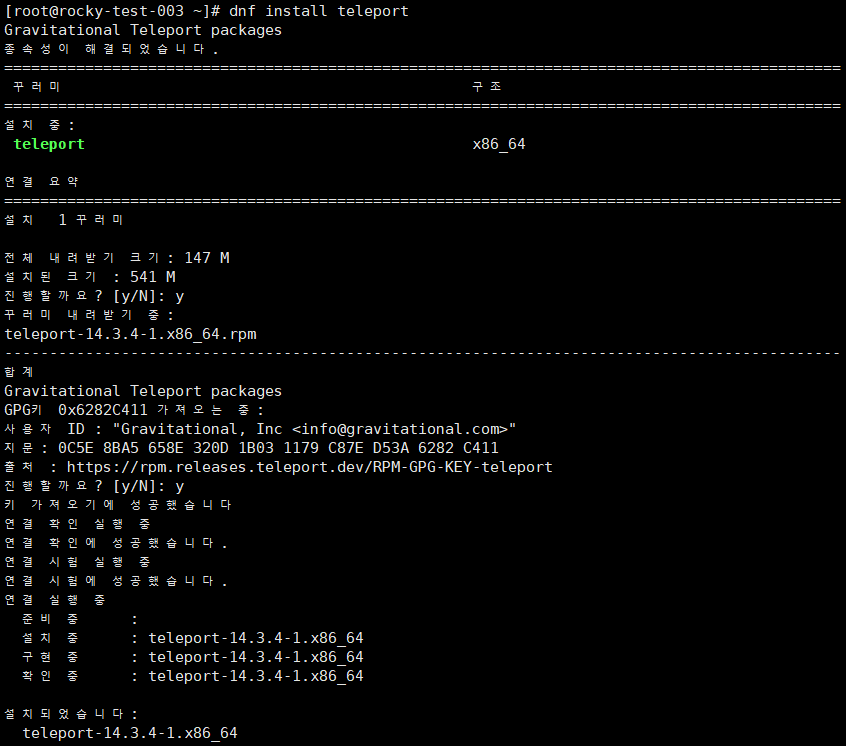
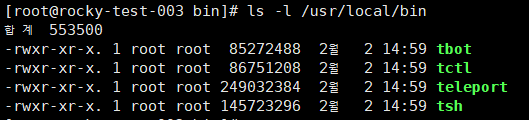
설치 하고 나면 아래와 같이 명령어가 생성된다
ConfigFile 생성
docker로 실행할때와 마찬가지로 config파일을 생성 후 해당 config파일로 실행하는 구조이다
teleport configure -o file \
--cluster-name=teleport.mysite.local \
--public-addr=teleport.mysite.local:443 \
--data-dir=/appdata/teleport/data \
--cert-file=/var/lib/teleport/ssl/teleport.mysite.local.crt \
--key-file=/var/lib/teleport/ssl/teleport.mysite.local.key
해당 명령어를 실행하면 /etc/teleport.yaml 파일이 생성된다.
방화벽 허용
본글 상단에 teleport container 사전지식에 있는 포트는 방화벽에서 허용 해야 한다. (Firewalld 사용 시)
[teleport 서비스 정책 설정]
vi /etc/firewalld/services/teleport.xml

#아래 설정 붙여넣기 후 저장
<?xml version="1.0" encoding="utf-8"?>
<service>
  <short>Teleport</short>
  <port protocol="tcp" port="443"/>
  <port protocol="tcp" port="3021-3028"/>
  <port protocol="tcp" port="3080"/>
  <port protocol="tcp" port="9090"/>
</service>
[적용]
firewall-cmd --permanent --add-service=teleport
firewall-cmd --reload
서비스 실행
dnf로 teleport 설치 시 systemd 서비스에 자동 등록된다.
실행방법은 systemctl로 실행하면 된다.
systemctl enable teleport
systemctl start teleport
마치며..
글 작성 당시에는 하나의 글로 작성하려 했으나 설명 중 Teleport 외 이것저것 주변지식을 설명하다보니 글이 길어져서 두개의 글로 나눴습니다..
초기 설정 후 관리자 계정 생성 및 로그인을 위해서 다음글을 참고해 주시기 바랍니다.
다음글
2023.12.26 - [분류 전체보기] - [계정/권한 관리] Teleport - 최초 설정 및 메뉴 설명